

Originally published on Domain7. Lightly revised for Co.school.
In nearly every design project I've been part of, we plan for one key moment where everyone (our team and our partners) comes together for a collaborative design workshop. We set aside a morning or an afternoon, bring whatever insights and research we've gathered, and walk out with the foundational ideas that will shape the final product.
Many organizations are still taught to wait for the solo sprint of a designer or developer, working alone to produce a solution for everyone else to vet. That "Mad Men" approach creates two problems:
- The persuasion problem. Once a creator has conceived of an idea, they have to pitch it. No matter how good the concept is, that sets up an "us vs. them" dynamic, where ideas are critiqued instead of contributed to.
- The blind spot problem. Partners have deep industry and community knowledge, but they're rarely given a structured way to contribute it. Involve them in the conceptual phase and their knowledge gets baked in.
The answer to both is involvement. A co-design workshop meets that need head-on, and it improves the design process in two unexpected ways: speed and quality. Ground gets covered very quickly, often saving weeks of back-and-forth. And a well-facilitated room generates more, and more diverse, ideas than any one person can.
Facilitating a workshop like this is a skill you can learn like any other. The biggest barrier is the mindset switch from designer to facilitator. You're hosting a collaborative process. Once you embrace that, what you choose to design changes.
Consider this guide a starter kit. Try it, see how it goes, and iterate. Adapt the agenda to the project, the team and the output you need. Make the method your own.
What you'll need
- A proper invitation. Don't just drop a calendar invite or a Slack message. Talk to people in real time. You're not scheduling a meeting; you're inviting people to bring their time and energy in a way that may be unlike anything else in their year.
- A well-chosen space. The same old boardroom says "business as usual." Look for somewhere open, well-lit (natural light if you can), with lots of wall space. For post-its. Ah, yes, the post-its.
- Snacks and water. This is hard mental work. Coffee and finger food are workshop fuel.
- A timer. Tracking time to the minute keeps momentum going. Your phone works fine.
- A noisemaker. Depending on the room, you'll need a way to call attention back to the front. A chime, a bell, a harmonica. Your choice.
- Low-fidelity sketching supplies. Small post-its, large easel pads, markers, and blank letter-size sheets.
The flow
1. Set the stage
This will be an unfamiliar way of working for many people. Open by sharing a few stories and perspectives so you can:
- Establish credibility. Explain where these methods come from (Google Ventures, Adaptive Path, IDEO).
- Encourage creativity. Some people will be uncomfortable being asked to contribute creatively. Name that, and reassure them.
- Explain the flow. Show the agenda in summary so people can prepare for this style of participation.
2. Form teams
Dividing people up can eat a surprising amount of time, so know your method in advance. Aim for three people per group. I usually create groupings ahead of time: not all the expert designers together, not all the clients together, not all the workshop newbies together.
3. Clarify the brief
Have total clarity on the brief before you start. Deciding exactly what you're asking people to redesign keeps the activity achievable. The brief might be a specific product to improve (a single screen, say), or a challenge your audience faces (a specific scenario or journey). Put it on a poster on the wall.
4. Listen to users, fast
This is a rapid version of the Interview Matrix method. The aim is to put people in contact with real users, which is a core practice of design thinking. Pick a question from the brief, like "What do you need most to accomplish this task?", and have groups split up for a lightning round of asking and note-taking.
No users in the room? Ask participants to imagine they are the users on this journey, and to record every step, piece of information or tool they'd need. The notes don't need to be polished. They're there to get co-designers into the user's head.
5. Make sense of it
Teams regroup and collate their insights onto a single sheet, grouping similar items and starring the three to five must-haves they believe users can't do without.
6. Crazy Eights
Crazy Eights is a well-documented exercise for generating ideas quickly. Working individually:
- Fold a sheet of paper into eight panels.
- Set a timer for about five minutes, marking 40-second intervals.
- Use each 40 seconds to scribble one idea in one panel: a button, a feature, a scenario, a tagline. Wherever your mind goes.
- Your ideas will be bad, obvious, simple, messy and confusing. That's the point.
When the timer ends, look at what you drew, then go again with another eight panels. Expand, push, play. It'll make sense later.
The tentative, awkward drawings are exactly what makes this work. We're not looking for polish; we're looking for messy ideas we can evolve.
7. The Flamethrower
Time for speed critiques. Send one person from each group to visit another group.
- The host group has three minutes to present their sketches.
- The visitor has three minutes to ask questions.
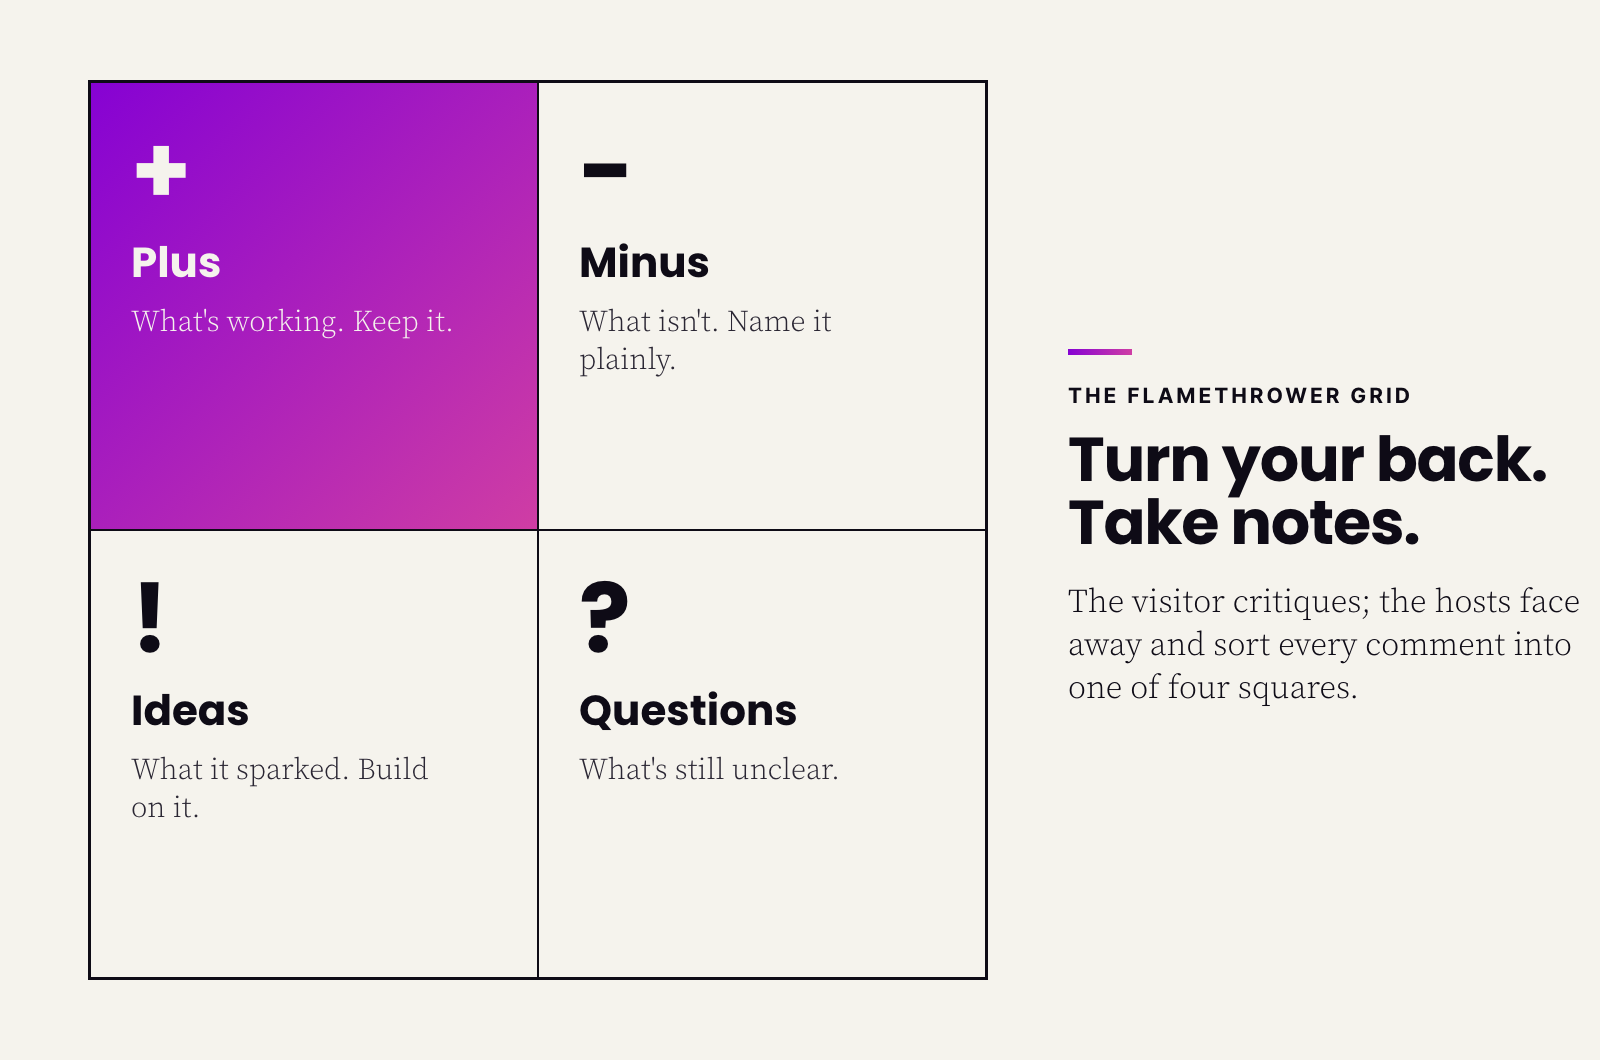
- Then the hosts turn their backs and take notes while the visitor "flame-throws," critiquing the ideas openly.
Yes, the hosts should actually turn around. It sends an extraordinary signal that everyone is on the same side, and it makes the criticism easier to hear. While the visitor talks, hosts sort every comment onto a feedback grid. (Run this round twice if you want more feedback.)
8. The master sketch
Teams regroup, share what they heard in the Flamethrower, and redraw their idea as one master sketch. It won't be pretty. Neither was the critique.
9. Pitch
Each team pitches to the whole room in three minutes. Hold to the time limit; people will want to talk about their drawings for a long while.
10. Vote and debrief
Hang the final drawings on the wall. Give people dot stickers or markers to flag the ideas they're most drawn to. Then talk it through:
- Which ideas stood out? Which are most intriguing?
- Where are the clear no-gos?
- What do we want to test with real users?
- How did this feel for you as a participant?
After the workshop
- Document it. Before anything comes off the walls, photograph every sketch.
- Design it. Give your designers independent time to synthesize the sketches into a recommendation, whether a wireframe or a fuller design.
- Discuss it. The recommendation will contain many familiar pieces from the workshop. Use it as a canvas for the next conversation.
- Test it. Get user feedback before going further.
Common objections
People will bring objections to an experience like this. Plan for them, or address them in your opening.
- "I don't design." You may be surprised how many everyday management tasks can be improved with design thinking. Give it a try; it might become a new secret sauce in your workday.
- "I'm not creative." Fair enough. A workout is how you build muscle; a workshop is how you stretch creativity. Trust the process and see what you learn.
- "I already know these methods." Perfect. Seasoned designers can act as embedded mentors for the people around them, and give us feedback on how to make it better next time.
Follow those steps and you'll have run a co-design workshop. How did it go? Drop me a note. I'd love to hear about it, and learn from it.